Add Rate Payer — Company / Organization
Overview
Lets an agent register a new company/organization rate payer, including creating its login account. A 2-step wizard: Organization Info → Account Setup.
Navigate to: Home → Quick Actions → Add Rate Payer → Company / Organization
See Add Rate Payer — Individual for the type-selection screen shared by both flows.
Step 1: Organization Info
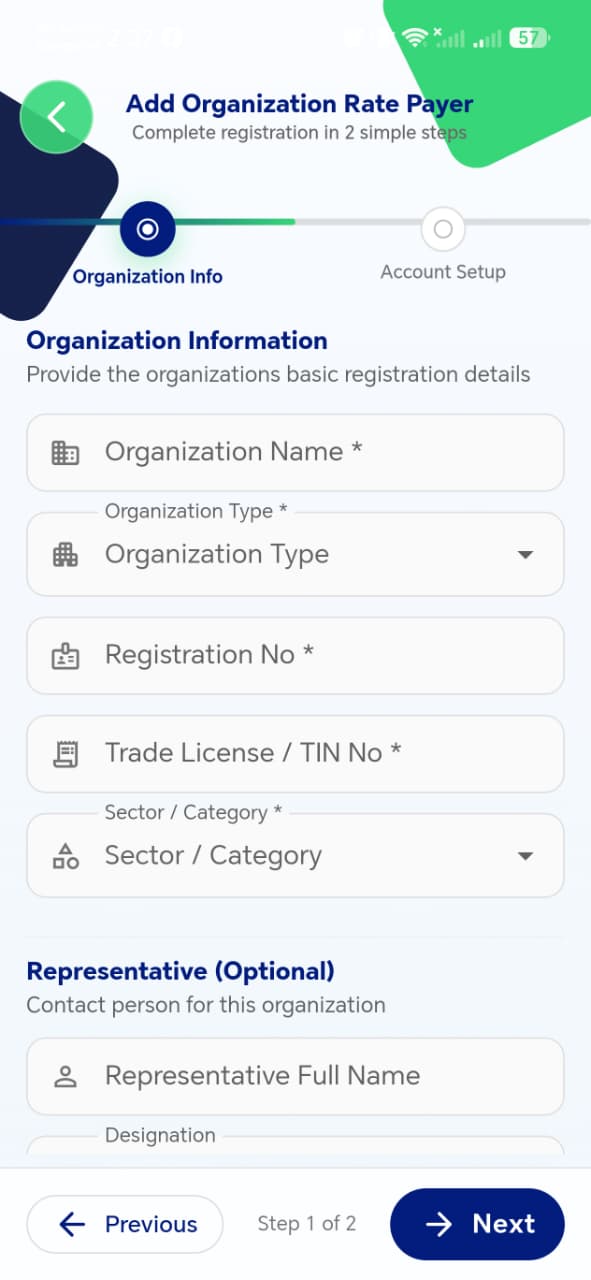
| Field | Required | Notes |
|---|---|---|
| Organization Name | Yes | |
| Organization Type | Yes | Dropdown |
| Registration No | Yes | |
| Trade License / TIN No | Yes | |
| Sector / Category | Yes | Dropdown |
| Representative Full Name | No (per this screen) | Under a "Representative (Optional)" section |
| Representative Designation | No (per this screen) | Dropdown, under the same optional section |
!!! note "Spec vs. screenshot" The functional spec marks Representative Full Name and Representative Designation as Required, but this screen labels the whole section "Representative (Optional)". Worth confirming with the dev team which is correct — if the spec is right, the UI label needs updating (or the asterisks are missing); if the screen is right, the spec needs updating.
!!! tip "Things to check" - Whichever way the Representative fields are meant to work, confirm Next actually enforces it — either blocking without them (if required) or allowing submission without them (if optional) - Registration No and Trade License / TIN No formats are validated, not accepted as free text
Step 2: Account Setup
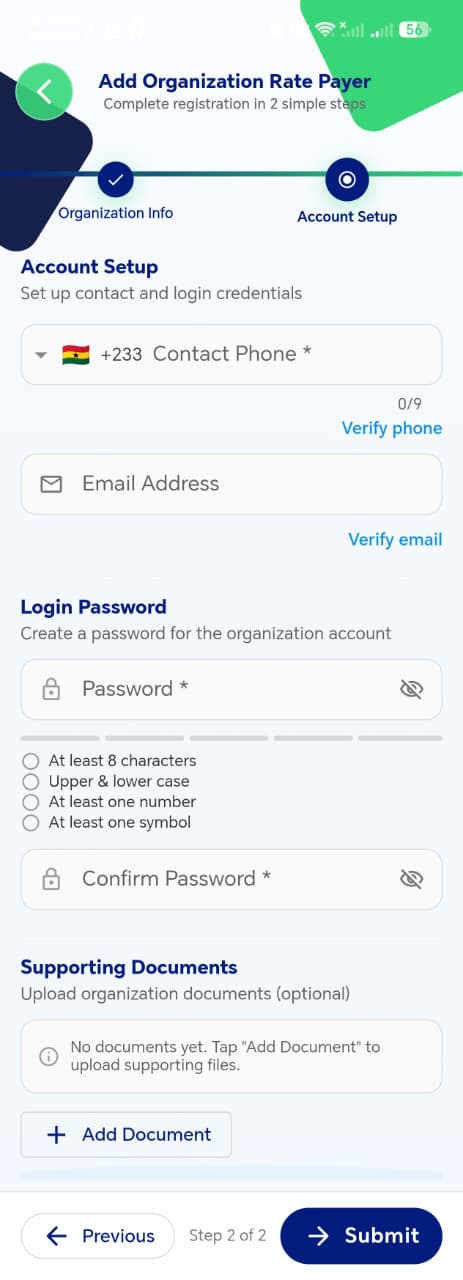
| Field | Required | Notes |
|---|---|---|
| Contact Phone | Yes | Country code selector + number, with Verify phone OTP link |
| Email Address | Yes* | With Verify email OTP link — see note below |
| Password | Yes | Same 4-rule strength requirements as Individual |
| Confirm Password | Yes | Must match Password |
| Supporting Documents | No | Add Document — shows "No documents yet" until at least one is attached |
!!! note "Email requirement" Unlike the Individual flow (where email is optional), this screen doesn't visually mark Email Address as required either — but since organizations plausibly need email as a primary contact channel, it's worth explicitly confirming whether it's required here, mirroring the Owner App's Company registration where email is required.
Verify Email Address
Tapping Verify email opens an OTP modal — same pattern as Individual → Verify Phone Number, just via email instead of SMS:
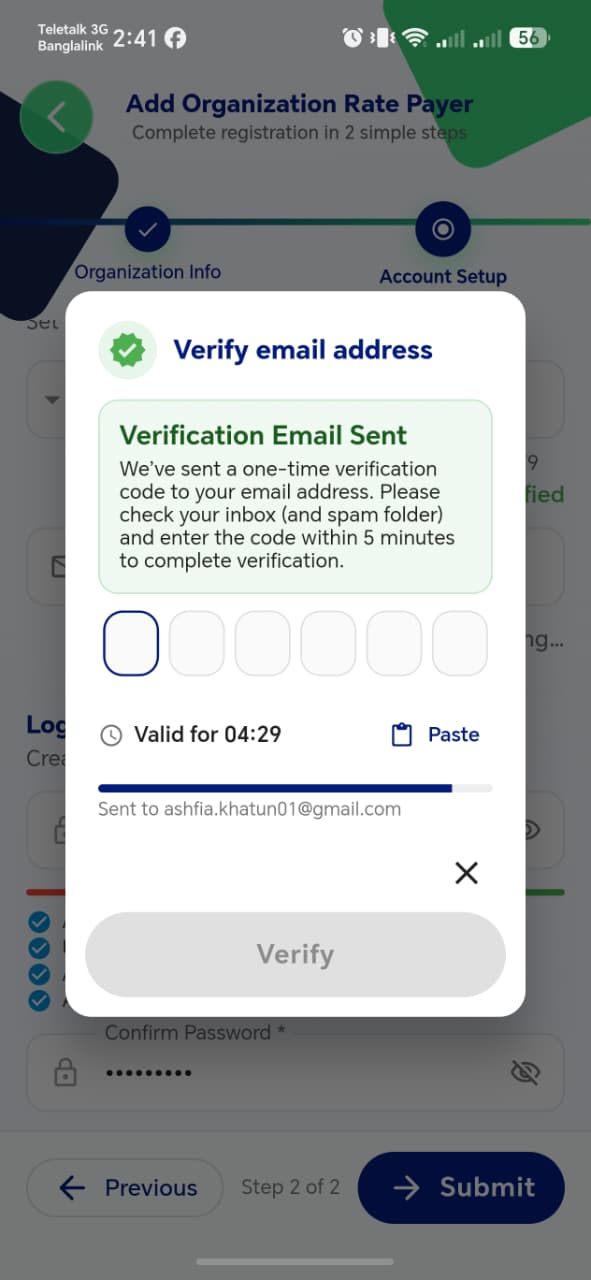
| Element | Description |
|---|---|
| Verification Email Sent notice | Includes a reminder to check the spam folder |
| 6-digit code input | |
| Countdown timer | e.g. Valid for 04:29 |
| Paste | |
| Destination shown in full | e.g. Sent to ashfia.khatun01@gmail.com — unlike phone, which is masked |
| Verify | Disabled until all 6 digits are entered |
!!! tip "Things to check" - Email address is shown unmasked here, unlike the masked phone number on the Individual flow — confirm that's an intentional inconsistency, not a privacy oversight - Add Document supports multiple files and multiple document types, consistent with the Owner App's document upload pattern
Submission
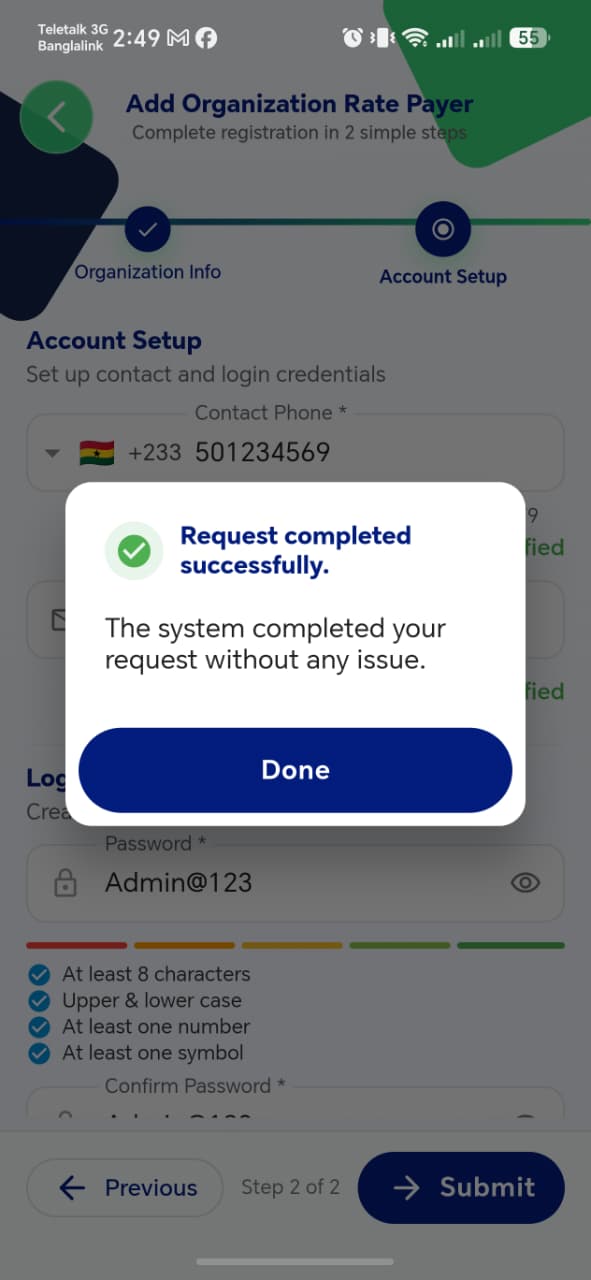
Once phone and email are verified and the password rules satisfied, Submit shows the same "Request completed successfully" confirmation as the Individual flow, with a Done button.
!!! tip "Things to check" - The new organization rate payer appears immediately in the Ratepayer list after Done - Submit is blocked if phone/email verification is incomplete - Uploaded supporting documents carry through correctly and are visible on the organization's rate payer profile afterward